
Difficulty: hard
Download a picture of the texture that you want to use (or use the one provided).
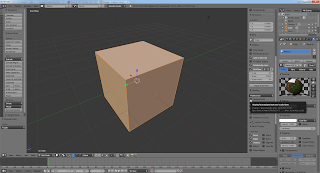
Open a new file in Blender
Right click to select the cube
Click on Object mode and change to edit mode.

In the texture menu, click on type and change it from none to image.


In the texture menu, click on image -> open and locate the image that you downloaded earlier.


In the texture menu, click on Texture mapping -> coordinates -> UV


Then click on the plus sign in the 3D view window to open 3D view properties.


Go down to the shading submenu in the 3D view properties menu.

Click on the box beside "textured Solid" - [if we don't click on this we won't be able to see the texture in solid viewport display mode (what we are using now)].
Close the properties menu by clicking on the left side of it and pushing it to the right.
Click on the 3 lines in the top right hand corner of the 3D view panel and drag to the left.
A new panel will open.
Change it to UV image editor.
Click on the cube in edit mode and hit U and then cube projection.
Scale the UV map down with S and position it with G in the UV/image editor.


Select individual faces in the 3D view and position them in the UV/image editor - you may need to rotate them.